How You Put a Glock 19 Slide on a Glock 17 Frame
Are you looking to upgrade your Glock 17 with a Glock 19 slide but feeling a bit overwhelmed? You’re not alone—many gun owners find this process tricky at first. The good news is, with the right steps, it’s easier than you think.
To swap a Glock 19 slide onto a Glock 17 frame, first verify both are compatible for your specific model and generation. Unload the firearm, remove the slide, and carefully clean and inspect the parts.
Align the Glock 19 slide with the frame’s rails, gently slide it into place, and check for smooth movement and proper fit.
If you follow proper steps, you’ll improve your firearm’s performance.
Keep going, and you’ll uncover all the details you need for a successful upgrade.
Key Takeaways
- First, make sure the Glock 19 slide actually fits your Glock 17 frame and generation. Compatibility is key before starting.
- To remove the slide from your Glock 17, you’ll want to use tools like punches and a flat-head screwdriver. Carefully follow the disassembly steps.
- Before installing the Glock 19 slide, inspect and clean both the slide and the frame. This helps ensure a smooth fit and operation.
- Carefully align the Glock 19 slide with the frame rails and slide it forward. Make sure everything lines up properly and fits snugly.
- After installation, do some functional checks. Confirm that the slide moves smoothly, is properly aligned, and fits securely.
Why Consider Swapping a Glock 19 Slide Onto a Glock 17 Frame?
Swapping a Glock 19 slide onto a Glock 17 frame can be a practical upgrade for many shooters. The slide offers a slightly smaller profile, which can make handling and concealability easier without losing performance.
Swapping a Glock 19 slide onto a Glock 17 frame improves concealability and handling without sacrificing performance.
You’ll notice improvements like faster cycling and more reliable feeding, thanks to the Glock 19 slide’s optimized design. This combo lets you enjoy the Glock 19’s shorter slide and barrel length, making it easier to handle in tight spaces.
Plus, the Glock 19 slide often has better optics compatibility and updated internal parts, which can boost accuracy and reliability. If you want to customize your pistol for better performance, this swap is a simple way to upgrade your firearm.
Whether you’re using it for duty, concealed carry, or at the range, this upgrade can make your shooting experience better by combining the best features of both models.
Understanding the Differences Between Glock 17 and Glock 19 Slides
The main differences between Glock 17 and Glock 19 slides are in their size, design, and compatibility. Glock design affects how each slide fits and works on its frame, influencing overall performance.
Slide mechanics, like how the slide moves and interacts with internal parts, vary slightly because of size differences. This can impact cycling reliability and smooth operation.
Frame compatibility is key. Glock 17 slides are larger and only fit full-sized frames, while Glock 19 slides are shorter and designed for compact frames.
Performance differences might include slight shifts in weight distribution and handling. Both slides are built for durability, though.
When it comes to customization, size and design matter. Some prefer Glock 19 slides for lighter weight and easier concealment, while Glock 17 slides offer a larger sight radius.
Knowing these differences helps you choose and modify slides to improve your firearm’s performance and suit your personal preferences.
Checking Glock Compatibility Before You Start
Before attempting to put a Glock 19 slide on a Glock 17 frame, you need to verify that they are compatible. Glock models have subtle differences that can affect fit, so check the specific model and generation. Not all Glock slides are interchangeable, especially across different slide variations.
For example, some Gen 3 slides may not fit Gen 5 frames without modifications. Confirm that the slide is designed for the same Glock model or compatible variants. Pay attention to the width, rail dimensions, and locking mechanism, as these are essential for proper fit and function.
If you’re unsure, consult manufacturer specifications or a knowledgeable gunsmith. Ensuring compatibility before you start prevents unnecessary damage or safety issues. Double-checking these details saves time and guarantees a smooth, secure fit when swapping slides between Glock models.
Gathering the Necessary Tools for the Slide Swap
Before you dive into swapping the slides, it’s a good idea to gather all the tools you’ll need. Things like screwdrivers, punches, and a cleaning kit are essential. Don’t forget safety gear, such as gloves and eye protection, to keep yourself safe while working.
Once you have your tools ready, take a moment to tidy up your workspace. Make sure it’s clean and organized, and that you have plenty of good lighting. A stable surface will make the whole process much easier and safer.
Required Tool List
Gathering the right tools is essential to guarantee a smooth and safe slide swap. You’ll need specific tool types to disassemble and reassemble the Glock securely.
Essential equipment includes a punch set, which helps remove pins without damage, and a flat-head screwdriver for tasks requiring prying or support. A rubber mallet can gently tap parts into place, while needle-nose pliers assist with small components.
An Allen wrench or hex key may be necessary for certain screws. Finally, a clean workspace and a parts tray help keep track of tiny parts and prevent loss.
Having this essential equipment ready guarantees you can perform the slide swap efficiently, minimizing stress and reducing the risk of damaging your firearm.
Safety Equipment Needed
Guaranteeing safety during a slide swap is essential to prevent accidents and protect yourself and your firearm. You should wear protective gear, including safety glasses to shield your eyes from springs or small parts that might fly loose.
Gun gloves are a smart choice to improve grip and protect your hands from sharp edges or residues. Before starting, make sure your workspace is clean, well-lit, and free of clutter. This helps reduce the risk of losing parts or making mistakes.
Always handle your firearm with the chamber unloaded and follow basic safety precautions. Using the right safety equipment not only protects you but also helps you stay focused and organized during the process.
Prioritize safety to ensure a smooth and secure slide swap.
Workspace Preparation Tips
Having the right tools within arm’s reach makes swapping slides smoother and safer. To keep your workspace organized, gather all necessary tools beforehand so you don’t waste time searching.
Proper tool accessibility helps prevent accidents and keeps your work efficient. Keep small parts in a container to avoid losing them.
A clean, well-lit area reduces distractions and helps you stay focused. Use the table below as a checklist to organize your workspace:
| Tool | Purpose | Location |
|---|---|---|
| Screwdriver set | Removing screws and pins | Toolbox or workbench |
| Punch tool | Extracting pins | Tool drawer |
| Cleaning cloth | Keeping parts clean | Nearby storage |
| Lubricant | Ensuring smooth assembly | Small container |
This setup guarantees a smooth, safe slide swap process.
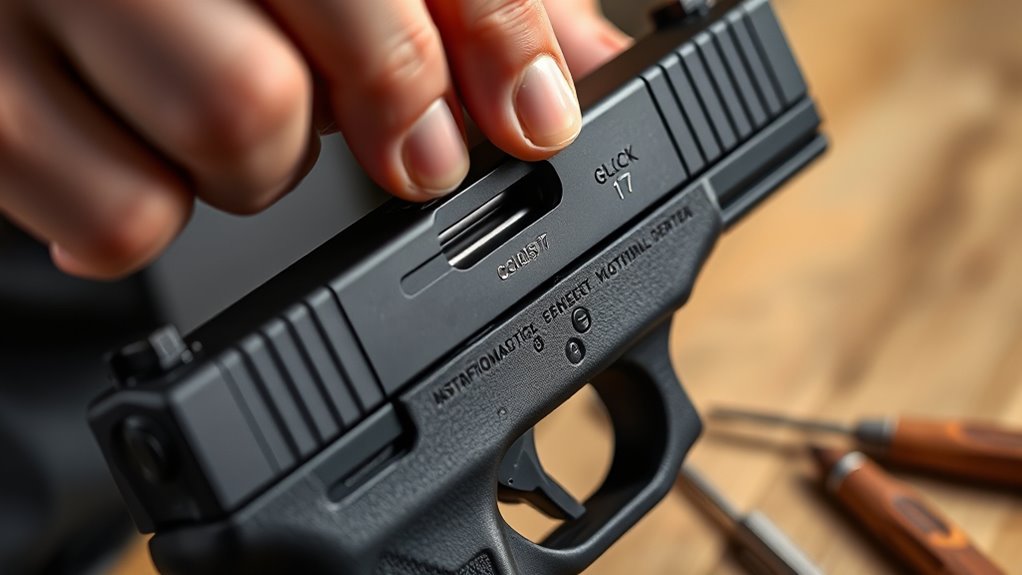
Safely Removing the Original Glock 17 Slide
Before you start removing the Glock 17 slide, make sure the firearm is unloaded and the magazine is out. Check the chamber visually and rack the slide a few times to be sure it’s empty.
Next, pull back the slide slightly and press the slide release to disconnect it from the frame. Carefully slide it forward, keeping the frame aligned as you go.
Pull back the slide slightly, press the release, and slide it forward while keeping the frame aligned.
Hold a firm grip so the slide doesn’t slip or fly off unexpectedly. If you feel resistance, double-check that the slide release is fully engaged and that the gun is completely unloaded.
Take your time and move slowly to avoid damaging the slide or frame. Once the slide is free from the frame, set it aside safely.
Handling everything carefully ensures you won’t cause any damage during removal. This process helps you prepare safely for any repairs or modifications you need to do.
Inspecting and Preparing Your Glock 19 Slide for Fitment
Before you try fitting your Glock 19 slide onto a Glock 17 frame, it’s a good idea to give everything a quick inspection. Look for any signs of wear or damage that could mess with how it works. It’s always better to catch those issues early rather than dealing with malfunctions later on.
Next, take some time to clean all the components thoroughly and apply a light coat of lubricant. This will help everything move smoothly and reduce the chances of any hiccups during operation. Once that’s done, double-check that the slide is compatible with your frame and fits properly. Making sure everything lines up right now can save you a lot of trouble in the future.
Check for Wear or Damage
Start by thoroughly inspecting the Glock 19 slide for any signs of wear or damage that could interfere with proper fitment. Use wear indicators to identify areas showing excessive use, like the slide’s rails, locking lugs, and barrel interface.
Conduct a damage assessment by checking for cracks, dents, or gouges that could compromise the slide’s integrity or function. Pay close attention to the recoil spring seat and extractor area, making sure they’re intact and free of deformities.
Any visible damage or excessive wear could affect how well the slide fits on the Glock 17 frame or cause malfunctions. Address or replace damaged components before proceeding to ensure the slide will operate smoothly and safely once installed.
Clean and Lubricate Components
Begin by thoroughly cleaning the Glock 19 slide to remove dirt, debris, and old lubricant that could hinder proper fitment. Use effective cleaning techniques, like a nylon brush and cleaning solvent, to reach all crevices.
Once clean, inspect the components for any residue or corrosion. Proper lubrication methods are essential to guarantee smooth operation and prevent wear.
Apply a light coat of lubricant to the slide rails, recoil spring, and other moving parts. Be careful not to use too much, as excess lubricant can attract debris.
Use a lint-free cloth for wiping surfaces, especially around slide rails and contact points. Avoid over-lubrication to prevent gunk buildup.
For peak performance, use high-quality gun oil when lubricating these parts.
Verify Compatibility and Fit
To guarantee the Glock 19 slide will fit properly onto your Glock 17 frame, you need to carefully verify compatibility and inspect the components. Check that the slide aligns correctly with the frame’s rails, ensuring smooth slide movement and proper slide alignment.
Look for any signs of wear, damage, or irregularities that could impact fitment. Confirm that the slide’s dimensions match the Glock 17 frame’s specifications, especially around the locking lugs and recoil spring assembly area.
It’s also important to verify the frame’s stability. The frame should be free of cracks or loose parts. By thoroughly inspecting these aspects, you can prevent misalignment issues and ensure your slide operates reliably and safely on your Glock 17 frame.
Fitting the Glock 19 Slide Onto a Glock 17 Frame
Fitting a Glock 19 slide onto a Glock 17 frame is pretty straightforward, but you need to pay attention to a few details to ensure everything works safely. Start by carefully removing the slide and checking the internal parts for any dirt or damage.
When installing the slide, make sure it lines up properly with the frame’s rails. It should move smoothly without any resistance. Use your fingers to slide it forward and check that the recoil spring and barrel are seated correctly.
Proper slide alignment is key for consistent firing and recoil control. Keep an eye on the fitment—make sure the slide doesn’t wobble or get stuck during operation. Double-check everything before firing to keep your firearm safe and reliable.
Troubleshooting Fitment and Functionality Issues
When you encounter fitment or functionality issues after installing a Glock 19 slide on a Glock 17 frame, it’s important to identify the root cause quickly. Common problems include misaligned slides or poor recoil management.
Check if the slide is properly aligned. Even slight misalignments can cause cycling issues. Recoil spring tension might also be a factor—if it’s too tight or loose, recoil management suffers and affects performance.
Inspect the slide rails for debris or damage, which can hinder smooth operation. Sometimes, the slide may appear to fit but won’t lock back or reset correctly.
Use the table below to troubleshoot common issues:
| Symptom | Possible Cause |
|---|---|
| Slide doesn’t lock back | Incorrect slide alignment |
| Failure to cycle properly | Recoil spring tension problem |
| Excessive recoil or muzzle flip | Poor recoil management |
| Slide binds or sticks | Debris or damaged slide rails |
| Inconsistent firing | Improper slide fitment |
Address each issue methodically to restore proper fitment and function.
Final Checks and Safety Testing Your Modified Glock
After you’ve put together your modified Glock, it’s really important to do some thorough checks to make sure everything’s working just right. Take your time to test the firearm’s functionality so you know it’s operating smoothly and safely.
Make sure to follow proper safety protocols during these tests—no shortcuts here. You want to confirm there are no malfunctions or hitches before you even think about using it. Once all these checks come back clear, then you can feel confident that your firearm is ready for action.
Functionality Verification Procedures
Before you fully assemble and test your modified Glock, it’s important to perform safety checks to make sure everything is working correctly. Start with a clear, unloaded firearm and do a visual inspection.
Next, focus on functionality testing by checking the slide alignment. Make sure the slide moves smoothly without binding. Confirm that the slide locks back properly and returns to battery consistently.
Test the trigger pull to verify proper reset and engagement. Examine the firing pin and extractor to ensure they operate correctly. Finally, perform a dry fire to check that the safety mechanisms engage properly.
Check for smooth slide movement and proper alignment. Verify that the magazine seats securely.
Confirm trigger reset and safety engagement. Make sure the slide locks back during empty magazine tests.
Safety Testing Protocols
After completing the initial functionality checks, it’s important to do final safety testing to make sure your modified Glock works reliably and safely. Always follow safety regulations and testing standards to ensure everything functions properly before use.
Start by visually inspecting the firearm. Look for any loose or misaligned parts. Then, perform dry firing to check the trigger reset and overall trigger pull. These steps help catch issues early.
Next, conduct live-fire tests in a controlled environment. Begin with low ammunition loads to verify reliable cycling and ejection. Make sure to observe all safety protocols, like keeping the firearm pointed in a safe direction at all times.
If you notice any problems during testing, address them immediately before moving forward. Final safety testing ensures your modification meets safety standards and helps prevent malfunctions or accidents during actual use.
Additional Customizations and Tips for Your Glock
Customizing your Glock can boost performance, comfort, and looks, making it fit your shooting style better.
Try exploring grip modifications to get a more secure hold and a personalized feel.
Upgrading your sights can improve target acquisition and accuracy, especially in different lighting.
You might also experiment with recoil springs or trigger parts to make your gun more responsive.
Adding stippled grips or grip tape can give you a more secure hold during rapid fire.
Remember, these customizations should be tailored to your needs, whether for competition, concealed carry, or just general use.
Always ensure proper installation and testing to keep your firearm safe and reliable.
Small tweaks like swapping sights or adjusting the grip can really boost your confidence and shooting experience.
Frequently Asked Questions
Will Swapping Slides Affect the Firearm’s Warranty?
Swapping slides can impact your firearm’s warranty because it might be seen as changing the original setup.
Different manufacturers have different policies. Some may void your warranty if modifications aren’t done by authorized personnel.
Always check Glock’s specific policies before making any changes, and consider reaching out to customer service for guidance.
Keep in mind, unauthorized modifications could limit your warranty coverage. Stay informed and careful to protect your investment.
Is Professional Gunsmith Assistance Recommended for This Modification?
Did you know that improper modifications can void your firearm’s warranty? It’s highly recommended to seek professional gunsmith assistance when swapping slides, as they have the best tools and expertise.
They guarantee safety measures are followed, reducing risks of damage or injury. While confident DIYers can attempt this, a gunsmith’s help ensures precise fitting and safe operation, especially for complex modifications like installing a Glock 19 slide on a Glock 17 frame.
How Does Slide Weight Impact Shooting Performance?
Slide weight notably impacts your shooting performance by affecting recoil control and accuracy improvement. A heavier slide absorbs more recoil, helping you stay on target and shoot faster with less muzzle rise.
On the other hand, a lighter slide allows quicker follow-up shots but may lead to increased recoil and less stability. Finding the right balance helps you choose the best slide weight to boost your overall shooting precision and control.
Can This Slide Swap Be Reversed Easily?
Yes, this slide swap can be reversed easily, but you need to consider slide compatibility and frame differences.
The Glock 19 slide fits well on a Glock 17 frame because of similar sizes. However, swapping back requires making sure the slide still matches the frame’s specifications.
Always double-check compatibility and frame differences before reversing the swap. This helps avoid malfunctions or safety issues.
Are There Legal Considerations When Modifying Firearm Components?
Sure, tinkering with your firearm might seem as innocent as swapping socks, but beware—there are legal implications lurking like ninjas in the night.
Modification regulations vary wildly, and unauthorized alterations can land you in hot water, even if you’re just trying to upgrade.
Always check local laws before modifying your firearm components, or you might find yourself in a legal maze, wishing you’d left well enough alone.
Conclusion
So there you have it—your DIY Glock Frankenstein is almost ready to hit the range. Just remember, if you somehow manage to turn your trusty Glock 19 slide onto a Glock 17 frame into a paperweight or a very expensive paperweight, it’s probably best to leave the gun tech to the pros.
But hey, if you pull it off without turning your Glock into a doorstop, you’ll have the bragging rights and a story to tell at every range trip.